Running SSH on Windows
SSH (Secure Shell) is a network protocol that allows data to be exchanged securely between one or more devices. It’s used to automate command execution and transfer files. SSH is most often associated with Linux, Unix, and other “non-Windows” operating systems, but it can run on Windows as well. This document takes you through the steps for installing an SSH server on a Windows machine.
Overview
There are several SSH servers available for Windows, both free and commercial products. I’ve found copSSH to be the easiest and also the most up to date.
- Download the installation package
- Run installer
- Authorize users
- Copy public key
- Update Security Group (Amazon EC2 only)
- Test connection
- Bundle AMI (Amazon EC2 only)
Note: This post describes the process for enabling passwordless logins via SSH. You will not be able to login with your regular password.
Download the installation package
The following installation package must be downloaded to the Windows machine which will run the SSH server.
http://sourceforge.net/projects/sereds/files/copSSH/2.1.1/Copssh_2.1.1_Installer.zip/download
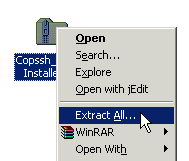
Run Installer
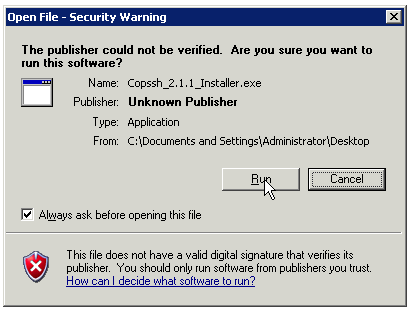
When you double click the installer, Windows will display a warning because the software isn’t signed by a known publisher. This is typical for free and opensource software on Windows. It’s safe to click Run.
Most of the screens explain themselves, but there is one the requires special attention. You need to specify a user with administrator rights to the machine. This example uses the Administrator account, but you can also specify a different one. It will create a new account for you if you specify a user name that does not already exist.
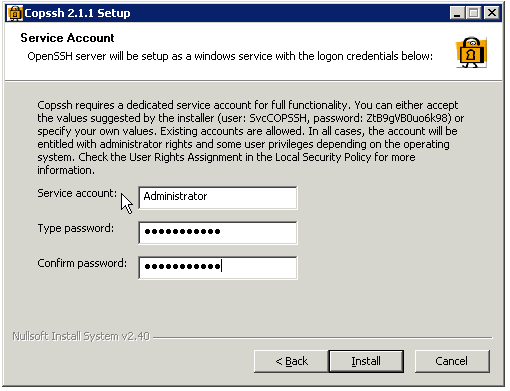
Note: Be sure to click Ok when prompted to start copSSH as a service.
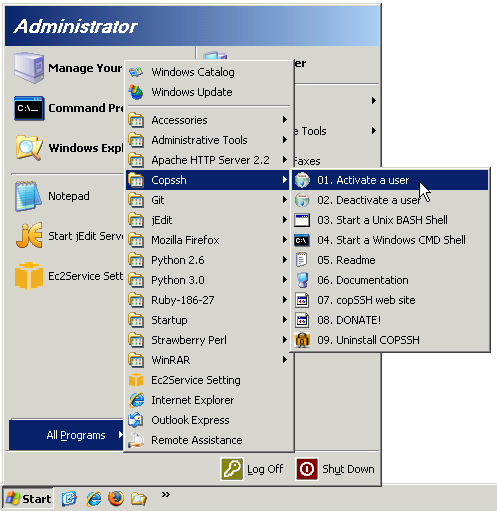
Authorize users
After completing the installation, you must authorize SSH access for at least one user. You can do this by going to Start > All Programs > Copssh > 01. Activate a user.
Copy Public Key
In order to enable passwordless logins, you must copy your public keys to the Windows machine. You can find your default public keys in ~/.ssh but you can specify others as well. Here’s a basic command for creating an authorized_keys file.
$ cat ~/.ssh/id_rsa.pub ~/.ssh/id_dsa.pub >> ./authorized_keys
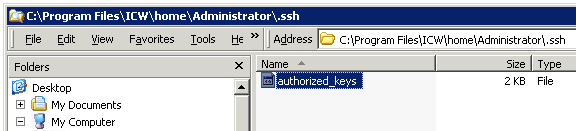
This file will contain a list of your public keys, one key per line. You must upload this file (or copy and paste the contents) to C:\Program Files\ICW\home\Administrator\.ssh\authorized_keys.
Update Security Group
For Amazon EC2 customers
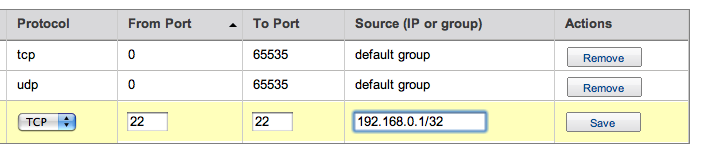
You need to open access to port 22 for the security group associated to your Windows instance. You will need to replace the source IP address used in this example (192.168.0.1/32) with either your external IP address (very safe) or 0.0.0.0/32 (less safe because this means it’s open for the entire internet).
You can use one of the following methods.
Via Rudy
$ rudy-ec2 groups --authorize -p 22 -a 192.168.0.1/32 grp-name
Via Amazon API Tools
$ ec2-authorize -p 22 -s 192.168.0.1/32 grp-name
Via Amazon AWS Console

Test connection
If everything went well, you will be able to login via SSH:
$ ssh Administrator@yourwindowsmachine
Last login: Wed Aug 19 07:01:19 2009 from 38.108.74.21

Administrator@yourwindowsmachine
$
Bundle AMI
For Amazon EC2 customers
If you’re running Windows within EC2, you need to create a machine image based on the running instance. Otherwise you’ll need to follow these steps again when you start a new instance!
There are two steps to bundling a Windows image. The first creates an image from the running instance and stores it to Amazon S3 (“Simple Storage Service”). Before executing the following command, you’ll want to consider the following:
- Have you changed the Administrator password? If not, make sure you’ve written down the password you used to log in the first time. Amazon doesn’t keep it on record so if you don’t know the password, you won’t be able to log in!
- Make sure everything on the machine is exactly you would like to see it when you start a new instance. For example, if you leave a bunch of files on the desktop that you don’t need, you will have to see them every time you launch a new instance of this image.
- Empty the recycle bin.
- Copy anything off of the
D:drive that you want to keep. That is a temporary disk that is destroyed when the instance is shutdown and not stored in the machine image.
Then run the following command to initiate the bundling process.
$ ec2-bundle-instance i-12345678 -b BUCKET-IN-US -p IMAGE-NAME -o accessaccessaccess -w secretsecretsecret -K path/2/pk-***.pem -C ~path/2/cert-***.pem --url https://us-east-1.ec2.amazonaws.com --region us-east-1
Bundling can take anywhere from 20 to 60 minutes. You can check on the progress by running ec2-describe-bundle-tasks. Once it’s complete, run the following to register the machine image to your account.
$ ec2-register --region us-east-1 BUCKET-IN-US/IMAGE-NAME.manifest.xml
That’s it. Don’t forget to shutdown the Windows instance!
Other Resources
If you have any questions or problems, feel free to contact me via the discussion group.